Author: Tommie

  • How to re-enable workspaces on Ubuntu 13.04 Raring Ringtail

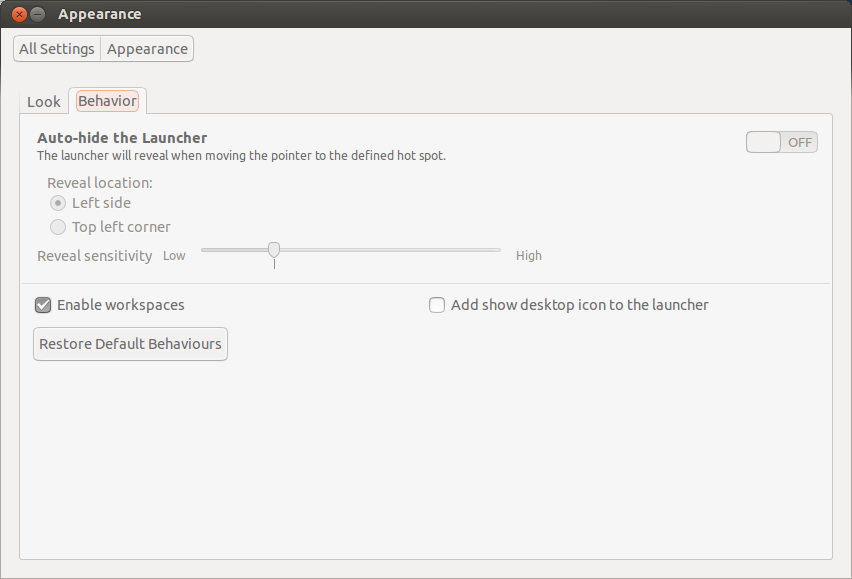
    enableworkspacesCanonical (the makers of Ubuntu) decided to remove the highly useful workspaces on default Ubuntu installations. But have no fear, this guide re-enables the workspaces within a minute or so.

    It’s actually a lot easier than i thought, so ignore below and just open Settings -> Appearance and click on Behavior. Now you can re-enable workspaces with the “Enable Workspaces”-checkbox.

    I’ve also updated the screenshot to better illustrate this.

    ———–

    First off we need to install unity-tweak-tool, either click on the link or type in the following commands in a Terminal (Ctrl + Alt + T)

    sudo apt-get install unity-tweak-tool

    Now open unity-tweak-tool using the Terminal:

    unity-tweak-tool

    In the window, click the “Workspace Settings”-icon (check the picture above) and flip “Workspace Switcher” to “On”.

    Workspaces have now been re-enabled on your machine and it’s a persistent settings, so you don’t need to redo this if you reboot your machine.

  • How to fix Unity And Compiz not showing after Ubuntu 13.04 upgrade

    Ubuntu 13.04 Raring RingtailAfter upgrading my installation of 12.10 Quantal Quetzal to Ubuntu 13.04 raring ringtail Unity decided to go in to hiding mode. Not sure why this happened, but resetting Unity And Compiz solved the issue for me.

    Resetting Unity and Compiz is exactly what it sounds like. It will reset all customizations and configurations you’ve done to Unity and Compiz. So make sure that you backup any settings you wish to keep. Your mileage may vary.

    Before resetting we need to install dconf-tools on your machine:

    sudo apt-get install dconf-tools

    Now run the following command to reset Unity and Compiz:

    dconf reset -f /org/compiz/

    All you need to do now is to logout and login and Unity should re-appear on you brand spanking fresh version of Ubuntu. Enjoy!

  • Getting Nvidia-drivers to work on Ubuntu 12.10 – Quantal Quetzal


    After installing Ubuntu 12.10 Quantal Quetzal on my development-machine i noticed that i wasn’t running on the Nvidia drivers for my GeForce GTX 560 Ti. And to make matters worse, the proprietary drivers didn’t work either. So i set out on a Google-hunt to find myself a solution.

    It seems like there currently is a bug in 12.10 which caused the Nvidia drivers to fail. Regardless for which repository (ppa:xorg-edgers/ppa etc) you’re using and if you’re using the latest version (304.32).

    Problems seem to be within the kernel, so you need to install the generic kernel including its headers. Then remove the current Nvidia-drivers and re-install them. Sounds complicated? It’s not, just run the commands below and reboot.

    Edit: Notice that you need to do this each time there is a new kernel upgrade in Ubuntu. So currently you should replace linux-headers-3.5.0-17-generic with linux-headers-3.5.0-25-generic in the instructions below.

    Jump over to a terminal
    Ctrl-Alt-F1 and login as your username.

    Install linux source and headers, make sure to use the current kernel version
    sudo apt-get install linux-source
    sudo apt-get install linux-headers-3.5.0-17-generic

    Uninstall nvidia driver
    sudo apt-get remove nvidia-*

    Reinstall nvidia driver
    sudo apt-get install nvidia-current-updates

    If it successfully installs, restart the computer
    sudo shutdown -r now

    This solved my problems with my GeForce GTX 560 Ti and i’m now running 12.10 in full GPU acceleration.

    Source:
    http://askubuntu.com/questions/202677/nvidia-driver-doesnt-work-in-12-10

  • Changing font-size in Ubuntu 12.10 without MyUnity

    Since MyUnity isn’t available yet in Ubuntu 12.10 Quantal Quetzal i though i’d write a quick update to my previous post which isn’t working on Ubuntu 12.10.

    The process is fairly simple, just run the command below and adjust them to whatever your preferred settings are.

    Just keep in mind to double-check that the fonts you’re using are indeed install. Otherwise you’ll end up in a world of hurt when you reboot.

    gsettings set org.gnome.nautilus.desktop font "Ubuntu 10"
    gsettings set org.gnome.desktop.wm.preferences titlebar-font "Ubuntu Bold 10"
    gsettings set org.gnome.desktop.interface document-font-name "Ubuntu 10"
    gsettings set org.gnome.desktop.interface font-name "Ubuntu 10"
    gsettings set org.gnome.desktop.interface monospace-font-name "Ubuntu Mono 11"

  • Changing the default font-size on Ubuntu 12.04

    Changing the default font-size on Ubuntu 12.04

    Are you like me and feel a bit overwhelmed by the default massive font-size in Ubuntu? Well, if you’re on Ubuntu 12.04 you’re in luck. Since there is a really easy way to change this setting.

    Luckly and thanks to some helpful individual we have MyUnity. MyUnity is a simple little tool that let you tweek most of Unity in 12.04 without having to install gnome-tweak-tool. The usage is really straightforward and it’ll have you customizing Ubuntu in no time.

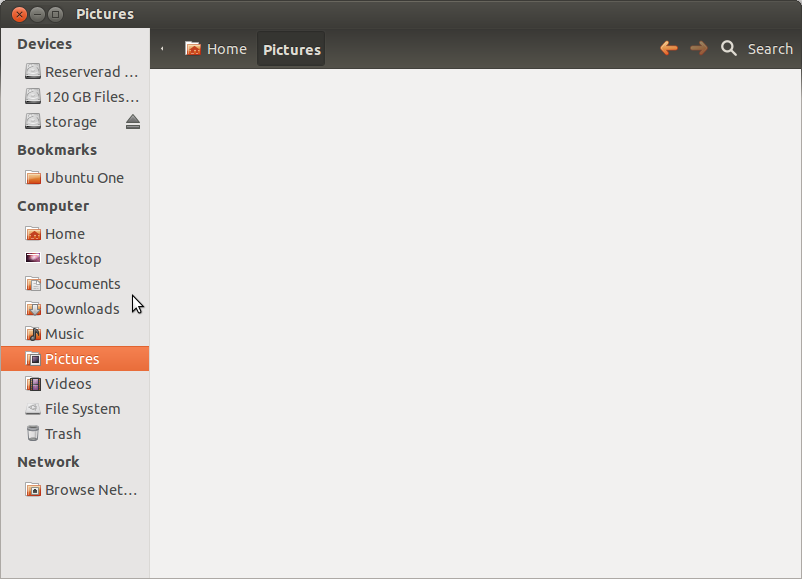
    This is how my default Ubuntu 12.04 looked like:

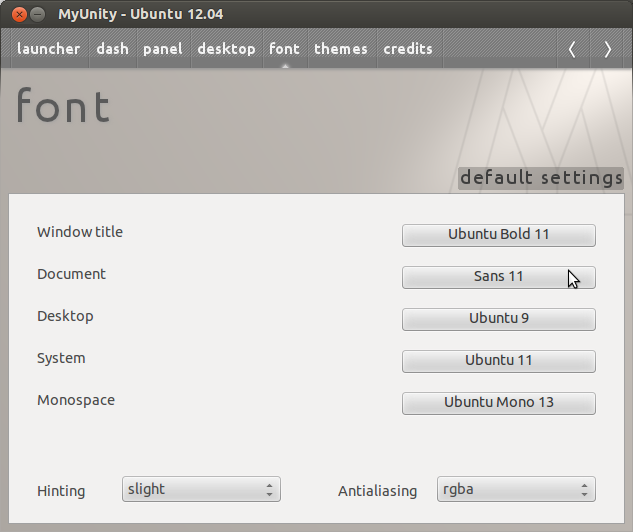
    Changing the font using MyUnity:

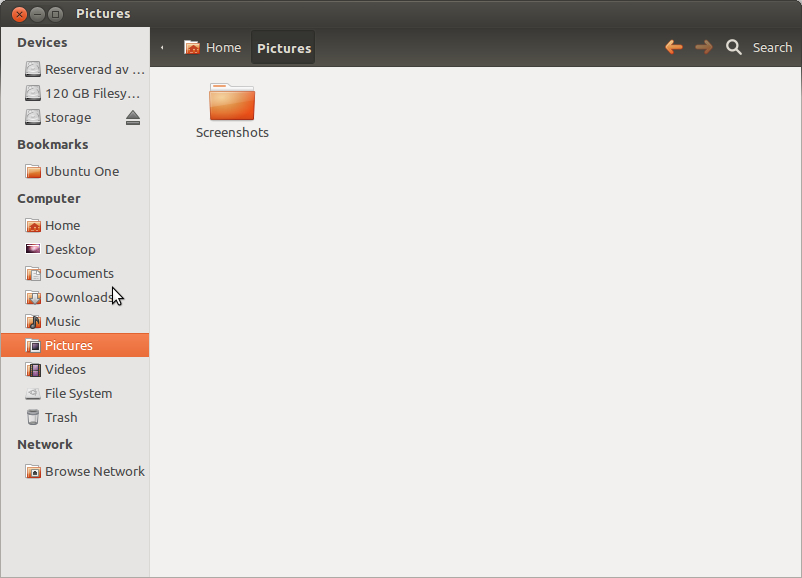
    And the result:

    It seems like this tool only work with 12.04 and older, so please read the appropriate documentation if you try and use it on a Ubuntu version below this. Also, i strongly recommend that you reboot your machine after doing the settings.

    Good luck and happy Ubuntu-ing!

  • How to get local files working with Ubuntu 11.10 and Spotify

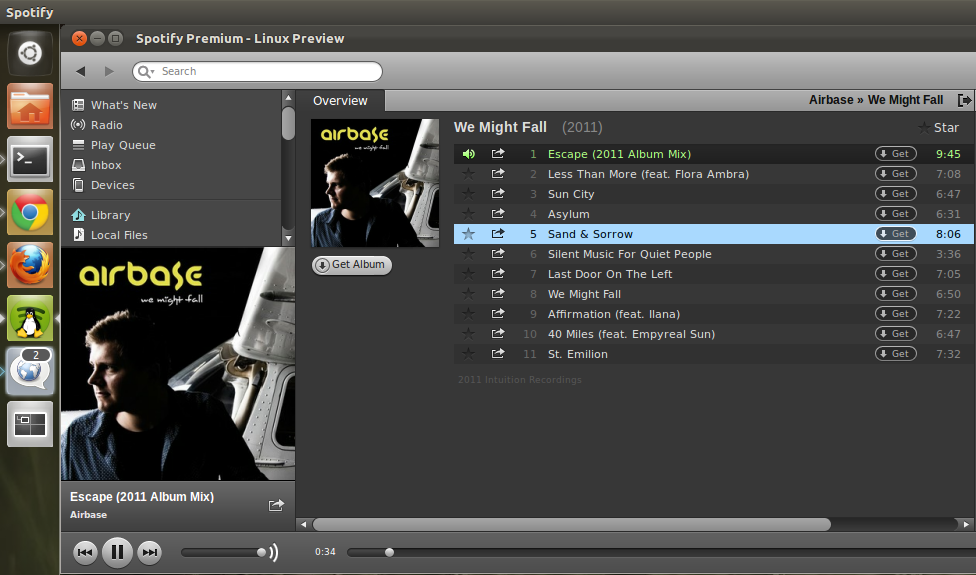
    Running in to the pesky “no codec found” when trying to play your local mp3 files in Spotify when you’re on a freshly installed Ubuntu 11.10? The problem is that Ubuntu recently changed the Qt media backend from libavcodec to gstreamer. While gstreamer plays (decodes) mp3-files just fine, Spotify wont have any of it.

    The solution is to manually add/install libavformat, libavutil and libavcodec52 from the previous Ubuntu version. Please notice that you need different set of files for the 32-bit and 64 bit version.

    32-bit Ubuntu:
    wget https://launchpad.net/~ubuntu-security/+archive/ppa/+build/2789249/+files/libavutil50_0.6.2-1ubuntu1.1_i386.deb

    wget https://launchpad.net/~ubuntu-security/+archive/ppa/+build/2789249/+files/libavcodec52_0.6.2-1ubuntu1.1_i386.deb

    wget https://launchpad.net/~ubuntu-security/+archive/ppa/+build/2789249/+files/libavformat52_0.6.2-1ubuntu1.1_i386.deb

    sudo dpkg -i libavutil50_0.6.2-1ubuntu1.1_i386.deb && sudo dpkg -i libavcodec52_0.6.2-1ubuntu1.1_i386.deb && sudo dpkg -i libavformat52_0.6.2-1ubuntu1.1_i386.deb

    64-bit Ubuntu:
    wget https://launchpad.net/~ubuntu-security/+archive/ppa/+build/2789247/+files/libavutil50_0.6.2-1ubuntu1.1_amd64.deb

    wget https://launchpad.net/~ubuntu-security/+archive/ppa/+build/2789247/+files/libavcodec52_0.6.2-1ubuntu1.1_amd64.deb

    wget https://launchpad.net/~ubuntu-security/+archive/ppa/+build/2789247/+files/libavformat52_0.6.2-1ubuntu1.1_amd64.deb

    sudo dpkg -i libavutil50_0.6.2-1ubuntu1.1_amd64.deb && sudo dpkg -i libavcodec52_0.6.2-1ubuntu1.1_amd64.deb && sudo dpkg -i libavformat52_0.6.2-1ubuntu1.1_amd64.deb

    No Spotify-restart required, it just works ™.

  • Java 7 prevents FTP transfers on Windows when firewall is on

    Java 7 prevents FTP transfers on Windows when firewall is on

    Experiencing problems with Java 7 and FTP transfers? You’re not alone since a nasty bug has slipped in to the seventh installment of Java and it’s causing major problems for its users.

    The problem consists of the FTP command PORT in conjunction with Windows Firewall on Windows Vista and Windows 7. The firewall simply closed this connection which close the socket and the ftp-transfer fails.

    This problem is especially troublesome for web developers that are using the java powered IDEs Eclipse and Netbeans. Since a simple upgrade to Java 7 will immediately cause the ftp transfers to stop working and the only remedy is to either close down (turn off) your firewall or downgrade to Java 6. Explicitly allowing the Javaw.exe process through the firewall did not solve the issue for me.

    Oracle has been alerted of the issue on the 11th of August 2011, but unfortunately gave the bug a 4-Low in priority, which probably means that they don’t see the magnitude of the problem and we won’t see a fix for this issue anytime soon.

  • Installing Zend Server Community Edition (CE) on Ubuntu 10.04.3 LTS

    Looking for a fast, reliable and easy PHP stack on Ubuntu? Look no further, the Zend Server is probably what you’re looking for. And if you’re developing your PHP apps in Zend Framework it’s a no brainer.

    I’ve been through most of the different stacks out there including doing the complete LAMP-installation from scratch. Maintenance is troublesome and configuration (and lack of personal configuration-documentation) makes most of my installations unmanageable after a year or so. Until i found Zend Server, especially the Community Edition which is a completely free PHP stack backed and built by the people over at Zend Technologies Ltd.

    If you’ve ever looked into different PHP frameworks you’ve probably stumbled over Zend Framework, which ties in extremely well with the Zend Server. So if you’re developing PHP apps using Zend Framework, the Zend Server will make your life a lot easier.

    Zend Server is a pre-integrated PHP application stack including the most up to date setup and configuration for your server (VPS, Amazon AMI etc). It includes Bytecode accelerator (Optimizer+), Zend Data Cache, A certified PHP distribution, Zend Framework, Apache (or IIS integration), Out-of-the-box connectivity to all common databases, Java code connectivity and a Web-based PHP administrator console.

    I recently setup another Ubuntu Server with Zend Server CE and thought i’d quickly run through the various commands you need to be up and running within no-time.

    I strongly recommend that you install this on a fresh server since Zend Server is preconfigured with webservers, databases, php etc out of the box. If you already have Apache, PHP etc installed on your machine you’re probably going to run into trouble. Also please keep in mind that you need to have sudo-access for this.

    Installing Zend Server Community Edition (CE) on Ubuntu 10.04.3 LTS

    Start by adding the official Zend debs to your distribution.
    sudo nano /etc/apt/sources.list

    And the following snipplet in the bottom of the file
    deb http://repos.zend.com/zend-server/deb server non-free

    Add the Zend’s repository public key
    wget http://repos.zend.com/zend.key -O- | sudo apt-key add -

    Now synchronize the repositories
    sudo apt-get update

    Finally install Zend Server with PHP 5.3
    sudo apt-get install zend-server-ce-php-5.3

    All done, you now have Zend Server Community Edition installed!

    You can access your installation via https://localhost:10082/ZendServer (secure) or http://localhost:10081/ZendServer. If you cannot access your server via a browser on localhost, just replace localhost with either the servers public IP or a domainname.

    From here on there are millions of opportunities, but i’ll try and cover those in another guide. Good luck and happy coding!

    More information and links:
    Zend Server Community Edition
    Zend Framework
    Zend Technologies Ltd.

  • Groovylists.com now support converting Spotify playlists to Grooveshark

    A most sought out feature has been added to Groovylists.com by high user demand. It’s now possible to convert you Spotify playlists directly to Grooveshark. The usage is simple and is very close to how you convert iTunes playlists to Grooveshark.

    Check out the video tutorial below for a quick run-down:

    Try it out yourself on:
    http://groovylists.com

  • Google listen up! Buzz needs proper localization to overpower Twitter. And here is how!

    And no, we do not want to have the Buzz interface localized in to our own language. We want to publish Buzz-posts in our native language, without having to use a dedicated account for it. Allow me to explain.

    Surprisingly enough isn’t English the only language on this planet, and a lot of people is struggling with numerous twitter-accounts to accommodate the followers. It is a annoyance for my English followers when i Tweet in Swedish and is probably equally annoying for any non-English-speaking-follower when i post in English. So the simple solution here is to use two accounts, yes? No.

    Since Buzz is in early development it is the perfect opportunity to introduce a meta-tag called “locale” or “localization” with each Buzz. If i post something in English on my tommiepodzemski-buzz account i simply tag it with the “en_US”-locale and if i’m posting something in Swedish i simply tag it with “se_SV” (and i’m sure you translation-wizards will figure out a way to auto-detect language to make this even more streamlined for the user).

    With this meta-data it’s a matter of UI adjustments to have an option which allow any Buzz-user to select which language-filter to for your friends buzz-stream. In my context, i’ll simply allow English and Swedish buzzes only. Rejoice! My Finnish, danish, Russian, Belgian, Dutch (ok, you get the picture) friend can now keep on Buzzing in any language they prefer. But i will only see stuff that i can actually read, ergo English and Swedish.

    This is something that Twitter is missing out on and i know this is something that a lot of users are missing out on – both on Buzz and on Twitter.

    So that’s that, update the code, adjust the UI and commit the change. Sit back and just enjoy the profit.